Over the years many a player has struggled with the maintenance and
tuning of their cocker type paintball guns, to varying degrees of
success. They are awesome markers, but their a bit more complicated in
semi auto configuration than the average semi auto, and sadly, many end
up at the bottom of the closet.
In the following, youll see just how
easy it is to convert your old derelict autococker based paint hurler,
into a super sniper pump!
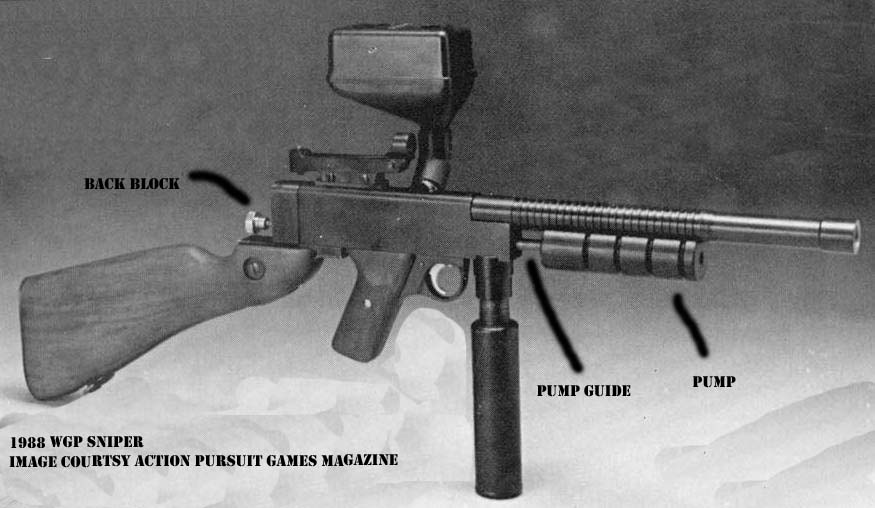
It is important to note, that the
Autococker started out as the Sniper, a pump paintball gun of
legendary status! Way back around 1986, a guy you might have heard of,
Bud Orr, inspired by the PGP but wanting something better with a
removable barrel, created the first Sniper. Bud Orr created Worr Game Products (WGP) in 1987 and started
selling the sniper commercially. The Sniper had the now familiar body you
see even on the latest cockers and wasnt converted to a semi auto
until a few years later, but thats a whole different story! The sniper
quickly gained a reputation as containing a whole lot of awesome, and
continues today as the base design of choice for some of the very best
players in the sport. Turning an autococker back into a sniper is allot
easier easier than you might think, and it rids you of all those
troublesome and pesky pneumatics!
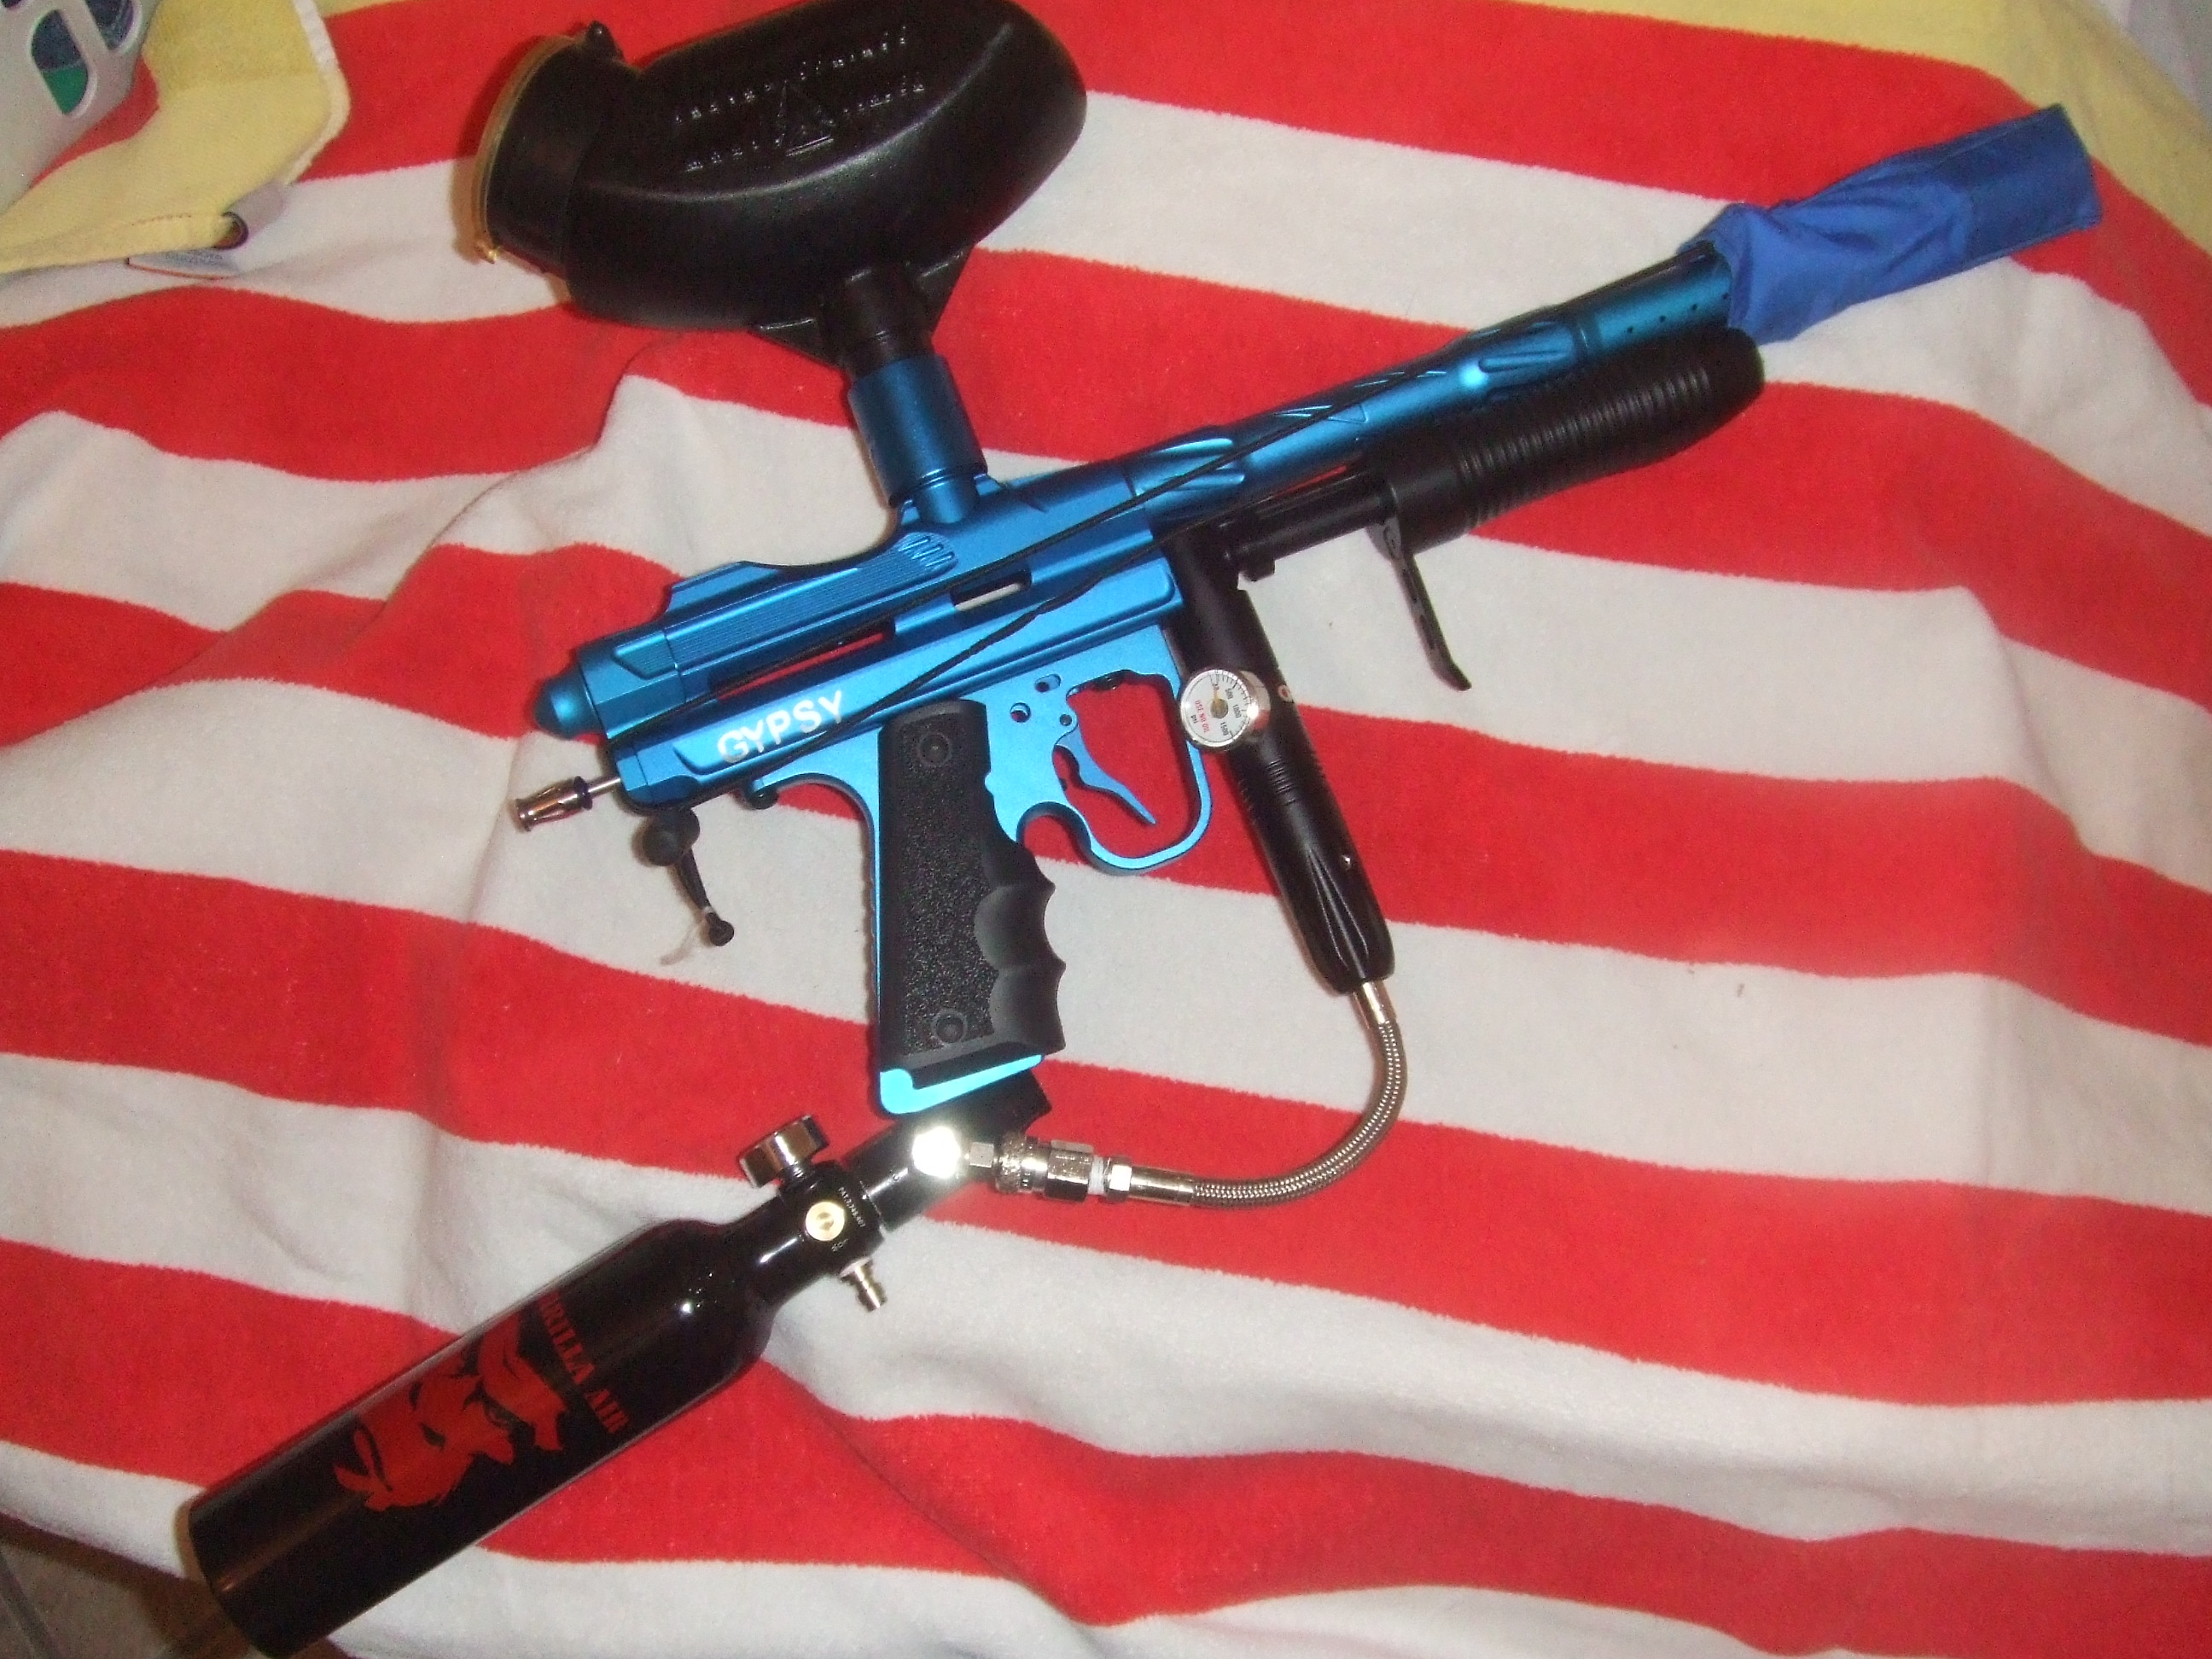
A note on
the Gat Products pump kit we used for this build:
I found
this a very easy kit to install, after doing a bit of online research.
The kit itself includes the front asa asembly (necessary only for the
mini cocker style conversions and significantly adds to the retail
price,) the delrin style pump , pump guide, a spring, the "gat guide"
which aligns the pump arm, and some cool stickers. No instructions were
in the box we ordered. This was not a manufactures gift, we paid $74.00
including shipping in a random purchase off of the gat products eBay
store. A detailed review is provided by strappa61 in the video below,
shared here with his permission.
Overall I
found the Gat kit to be of high quality and a good value, a "normal"
cocker pump kit can cost as little as $30, and specialty kits can go
above $200.00 The gat kit is a great answer for a midrange conversion
and immediately available as of June 2013. CCM also makes a high
quality pump kit, and there other specialty manufactures still making
them, mostly on special order as well.
Image edited for article use.
Before you start, youll need a few supplies:
Tools:
You'll need either an Allen key set, or screwdriver set (or both) to
disassemble parts of your autococker, including a very small one. Look
at your marker and ensure you have the proper tool for every bolt and
screw on it. You may also need some hand tools such wrenches to remove
air lines.
Supplies:
·
A pump conversion kit for the sake of this article, we will be using
a Gat Products mini cocker pump conversion kit ($74.00 including
shipping at the time of this article.)
·
An autococker valve removal tool (optional but recommended if you want
to tune up as the same time.)
·
O-ring or repair kit for the specific make of cocker your working with.
·
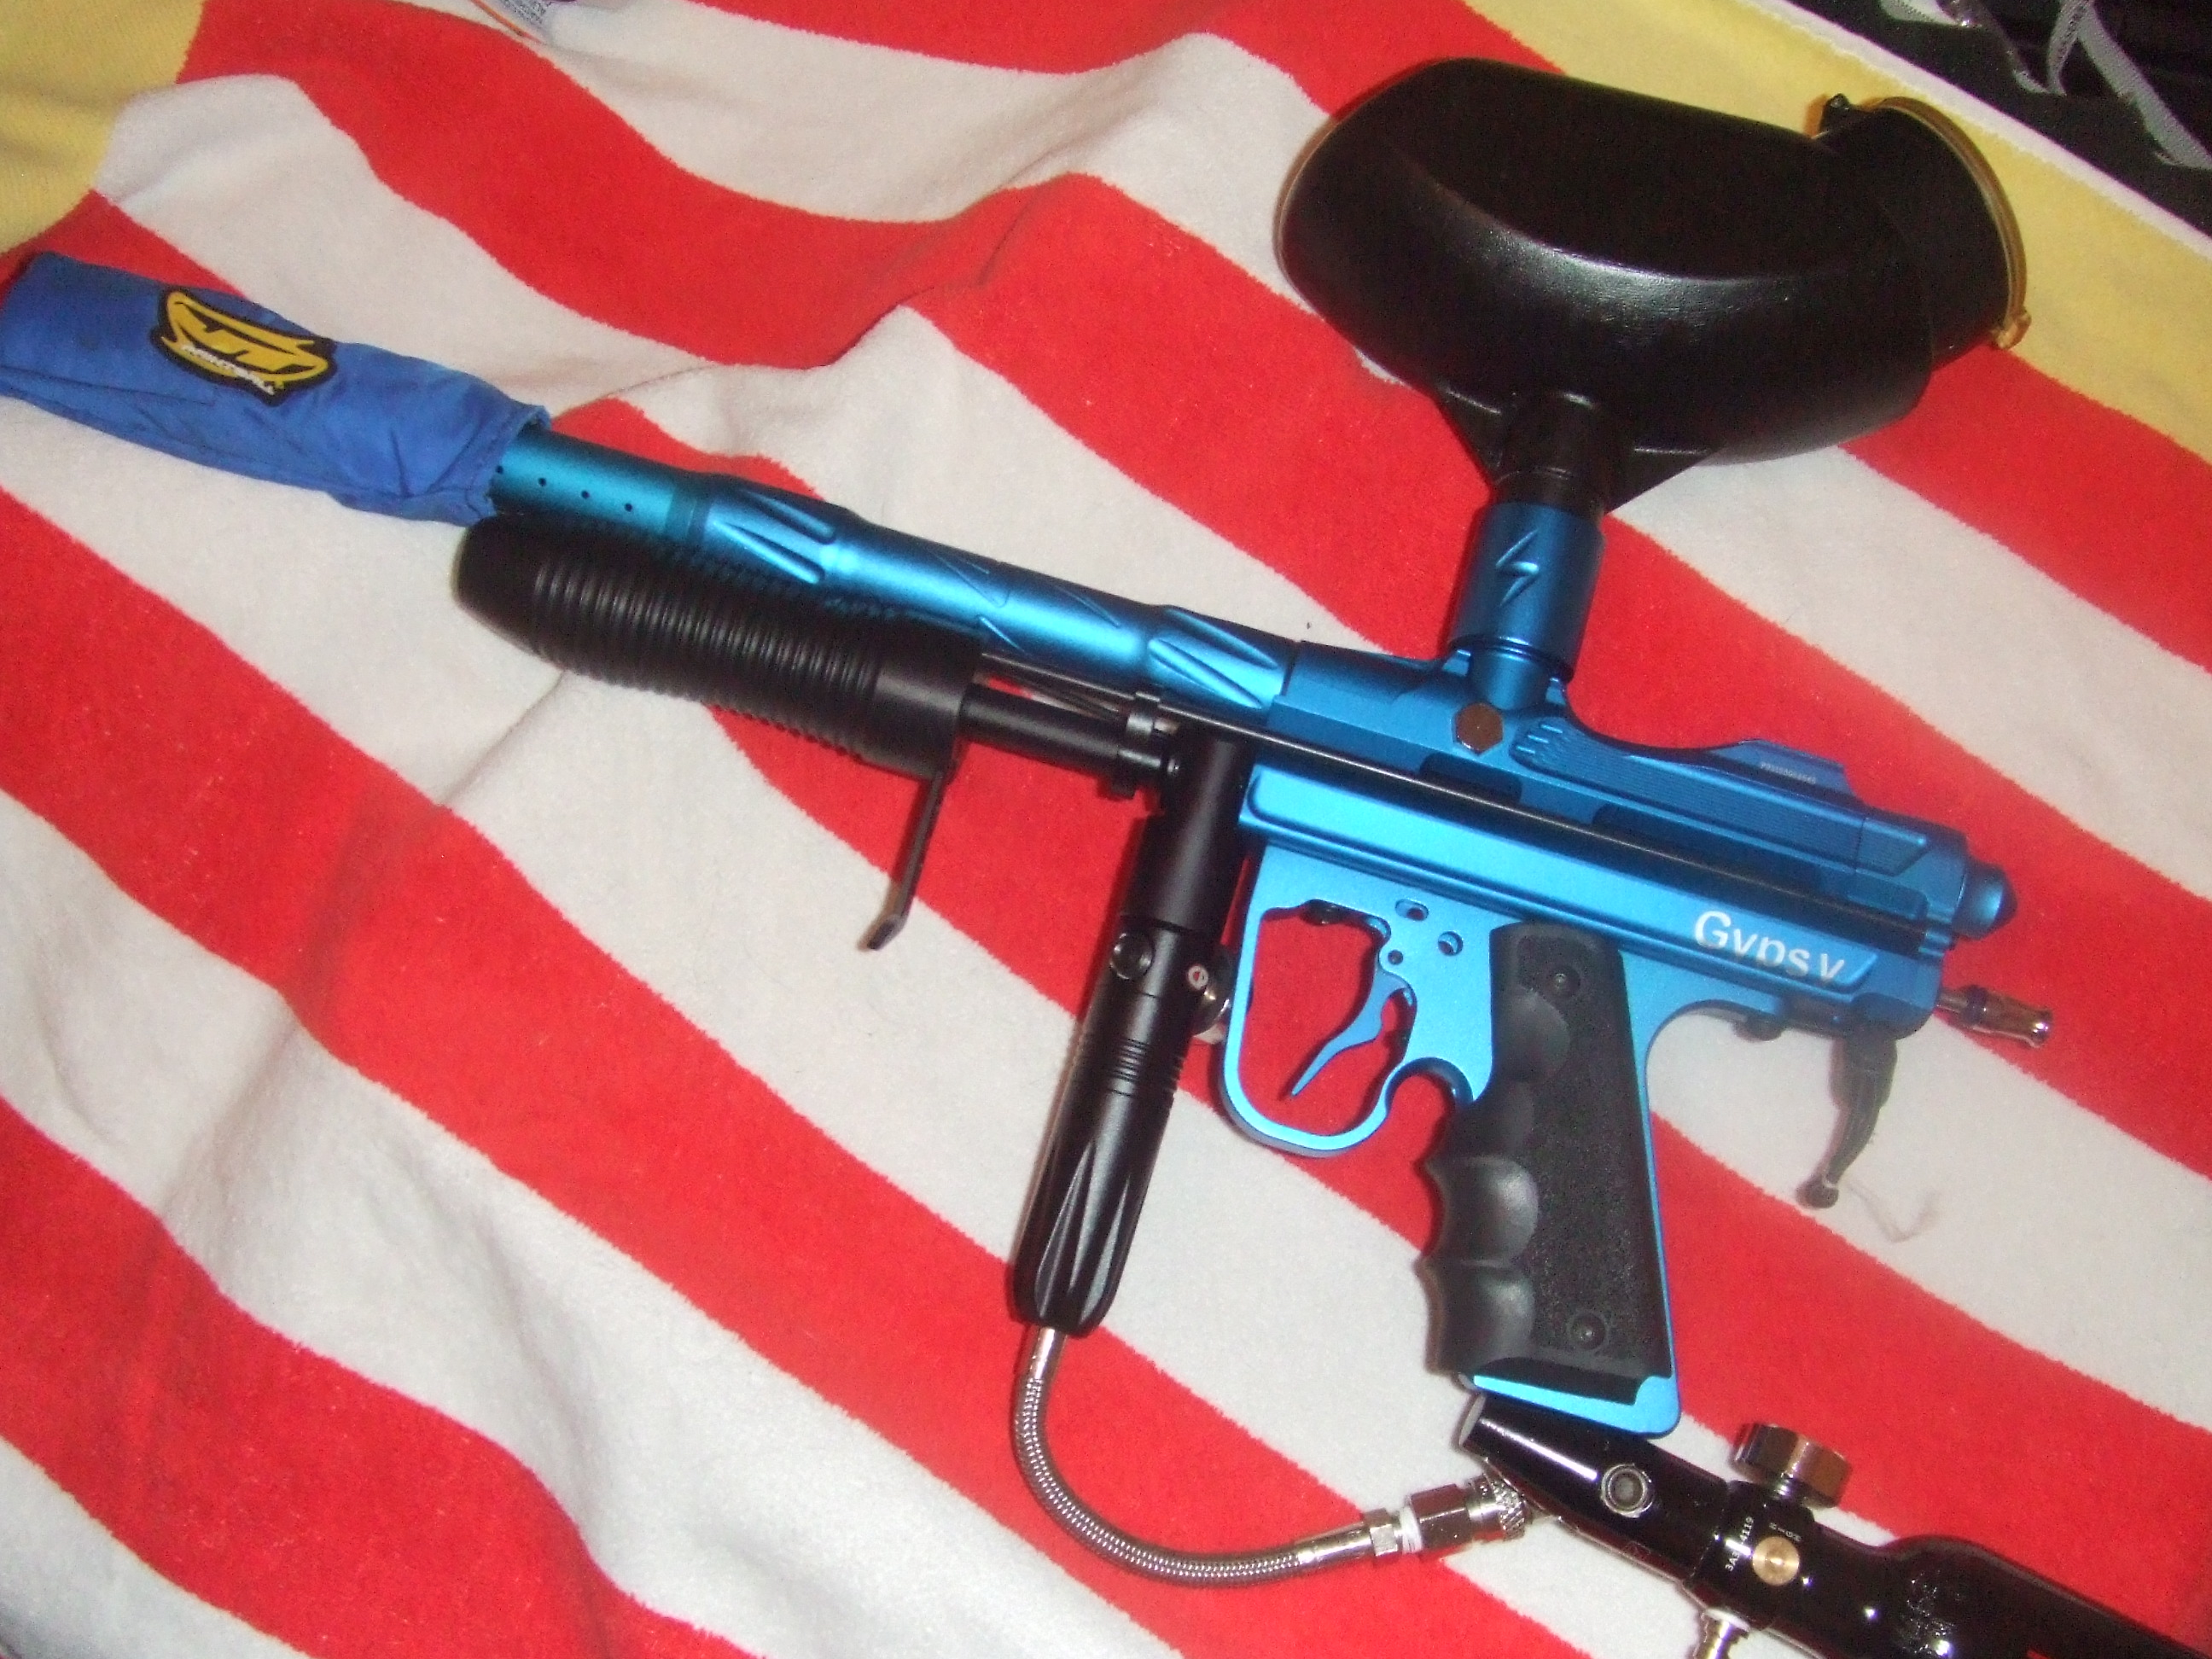
An Autococker or clone to convert. In this case we are using a
Psychoballistics Lightening, which is a mini version of the
autococker.
·
Cleaning supplies, once apart, its a great time to makes sure
everything is spotless, especially if you donor gun was put away
un-cleaned.
Now that youve got your supplies together, spread out a towel, and take
a good look at your marker. Note how the pieces all go together, where
the screws go, how its configured. . If you dont think you can
remember how it all goes together, take a picture or use masking tape to
number each part to use for reference later on. Before you start,
make sure the air source or co2 tank is completely disconnected from the
paintball gun. Some guns will actually hold co2 or air in the
valve, and still shoot even with the air source disconnected, so dry
fire the gun a few times if possible in a safe direction to make sure
its completely de-pressurized.
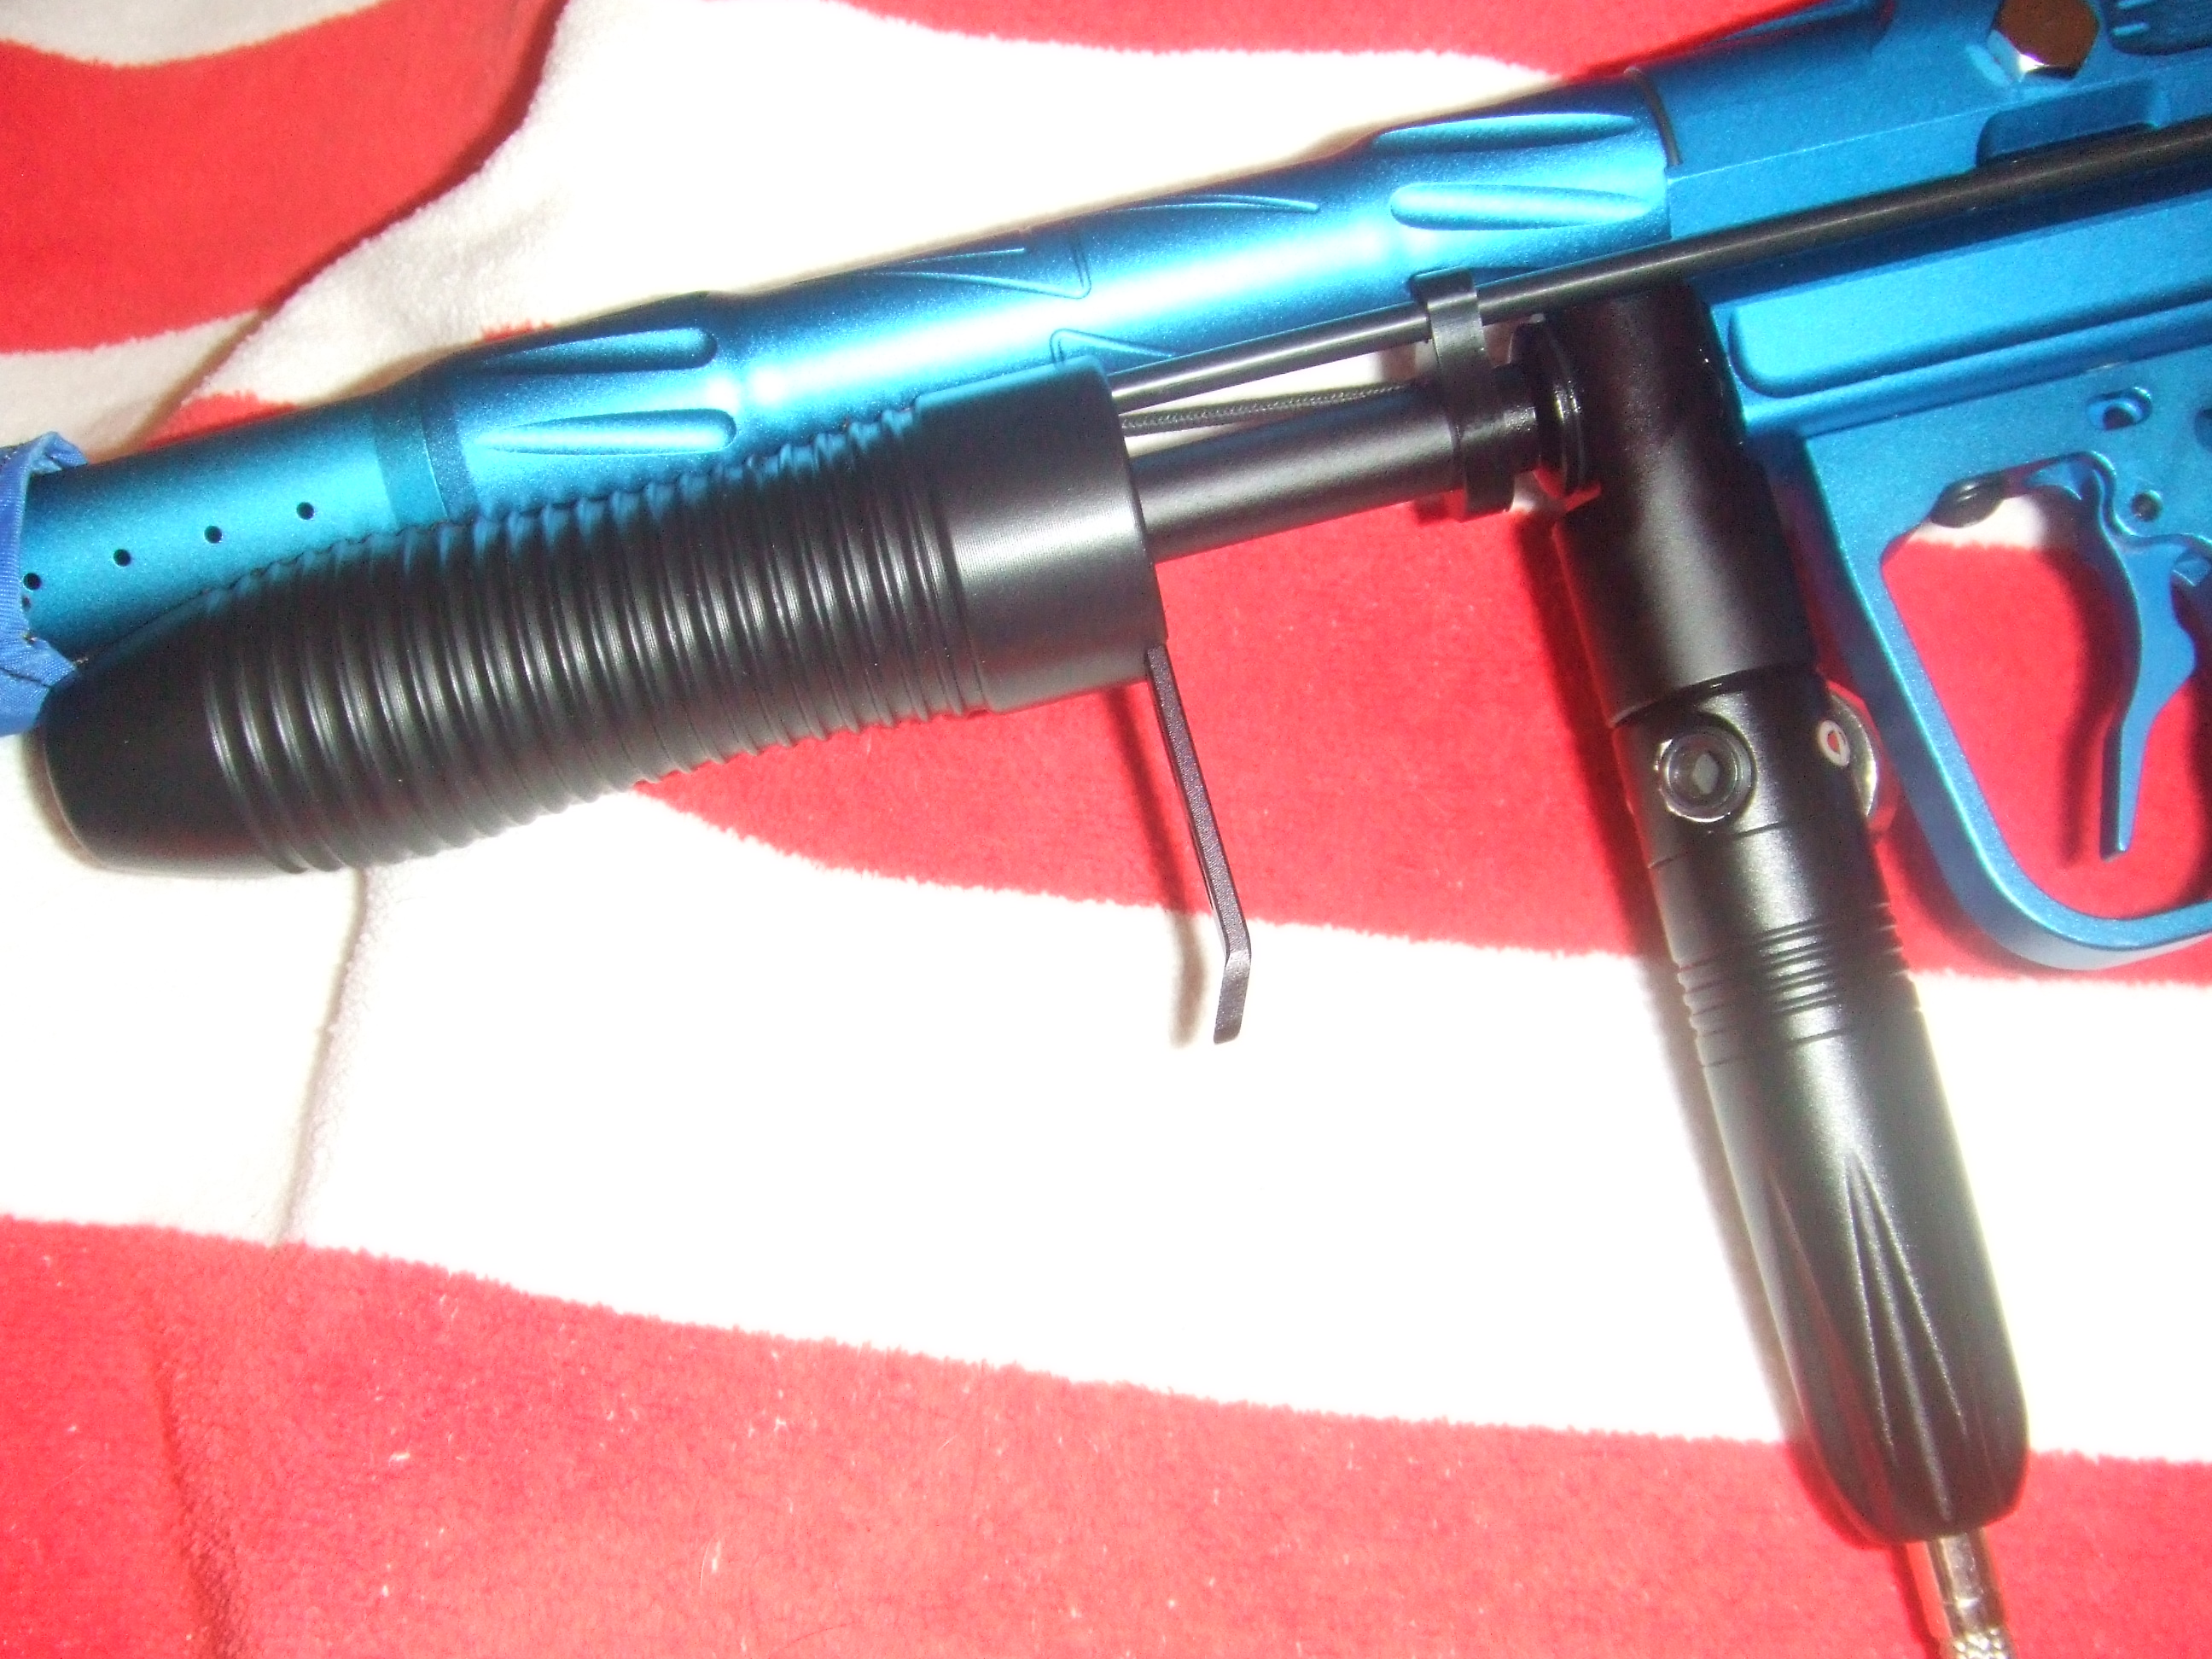
Installing your Pump Kit:
The Short version:
Unscrew front block, remove trigger rod and rear block. Screw pump guide
into hole where front block was, install pump and screw pump arm into
rear block. Adjust as needed, go shoot paint.
The Long version:
1.The Pump kit your using will contain a number of parts, each manufacture
has a slightly different way of pumping and autococker, but the concept
is always the same. Check out the instructions if included, and the
pieces you have and how they will fit on your gun. Now is the time to
plan out your build. Do not disassemble pump kit pieces unless you are
certain you need too.
2.Lay out the parts you will be installing, and complete any pre assembly
needed, some kits will require you to install pump rods into the pump.
3.
Remove and inspect the bolt, if it has o-rings, now is a good time to
replace them.
4.
Remove trigger rod from your front pneumatics. This is the metal rod
that connects your trigger to the front block. This step may require and
allen key to disconnect a coupler, or simply unscrewing the front 3 way
center shaft.
5.
Remove the bolt (pull pin or twist lock release) and back block by
unscrewing from the long rod, in some cases it may be necessary to use a
set of pliers to hold the rod in place, use care not to damage it. If
you decide to restore you marker to semi auto operation, you will need
the rod in good condition.
6.
Unscrew the securing bolt in the center of the front block, the front
pneumatic package should pull away as the bolt loosens. Set this unit
aside and a safe place, you will not need it unless you decide restore
your cocker to semi auto.
7.
(optional) Remove all internals and replace all orings , springs and
seals since youve got it apart already, please reference your
manufactures directions or research this process elsewhere.
8.
Install the pump rail guide, onto the pump guide (if applicable, do not
tighten yet), and onstall the pump guide into the front of the marker
where the front block screws in.
9.
Install any springs that may come with the pump kit.
10.
Install the pump onto the pump guide, and the back block onto the
cocking arm.
11.
Reinstall the back block
12.
Check and adjust the cocking arm and pump motion, ensure the bolt is
fully closed when the pump is forward, and that it full clears the feed
neck when pulled all the way back.
13.
In some cases, you may need to stretch the spring, or add an extra
spring, or a longer spring may be necessary to reduce play in the pump.
I found this necessary in the GAT kit, as the pump would not travel back
to the fully closed position on its own. This action is more of a
personal preference, adjust it too your comfort level.
14.
Secure or tighten all screws and securing bolts.
15.
In a safe area, test the marker, adjust as necessary.
You tube author Strappa61 did a great video on building a Lightening
Sniper using a Gat Products pump kit:
Once youve reassembled your paintball gun, its a good idea to
test the action , pump the pump, BEFORE putting a co2 source on the gun. Dont over tighten screws, stripping out aluminum threads is very
easy and its expensive to fix. Just hand tighten everything so its snug,
and youll be okay. Your done!! Dont forget to rechrono your
marker before you play with it, and always keep safety first!!!